Forest Pro-Installation Service

We offer our Pro-Installation Service on a wide range of our garden products. Please refer to individual product pages for availability. To add installation for Forest garden buildings, please select it from the Installation Options drop-down box on the product page. 


Where is installation available?


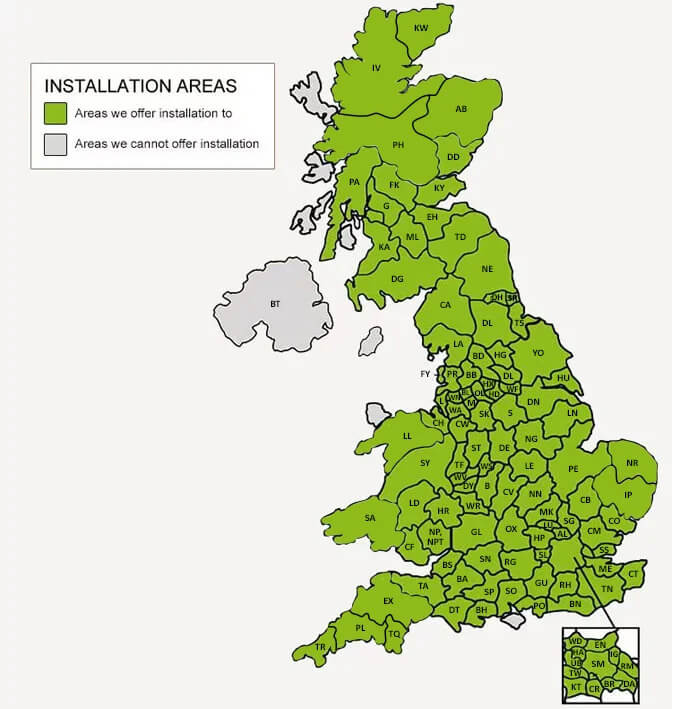
We offer our Pro-Installation Service to most UK mainland postcodes. Please see the map to check if this service is available in your area. Any orders placed for installation outside of these postcode areas will not be accepted.


Postcode Areas not covered by our Pro-Installation Service: 
BT, GY, HS, IM, JE and ZE Postcodes


What happens after I order?


The manufacturer will contact you via email and send you a base preparation document. This contains important advice on preparing a base and information about the installation process.


Once a delivery date has been booked, the installation team will contact you to arrange an installation date. They aim to book this as close to your delivery date as possible, so it is important you check your delivery and contact them in the rare event anything is missing or damaged.


When will we install your garden building?


We aim to carry out installation within 2 - 3 weeks of delivery. If you were able to choose your delivery day when you placed the order, we will contact you if we need to change this date.


Either way, the team will call you the week before installation to finalise details and help ensure a successful installation on the day.


Pre-Installation Checklist


Please take the time to read this information fully.

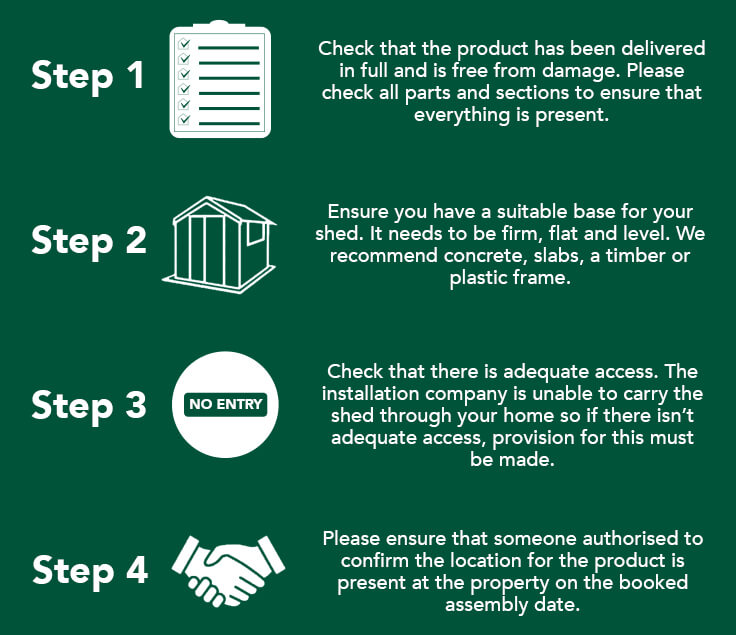
Step 1) Product Check Upon Delivery


Upon delivery, check the product has been delivered in full and is free from damage. Please check all parts and sections to ensure everything is present. If there are any shortages or damaged items, please contact us immediately so we can supply the parts prior to installation. 


Step 2) Ground/Base Preparation Before Installation


A correctly prepared ground surface is essential to ensure the successful assembly of your product and to enable our installation team to start assembly. Please take the time to read this information fully. The ground must be level and free from debris such as stones, tree roots and other disruptive materials.  All garden buildings will require a base. 


The most suitable construction materials for a new base are:


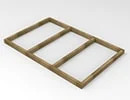
Timber Bases


A timber base can be constructed from pressure treated (tanalised) 3” x 2” timber joists nailed together to form a frame. Timber shed bases are also available to buy pre-made – please make sure you purchase one correctly sized and compatible to the structure you are having installed. Once built and installed, the timber base must be level. 


Please note: Our Pro-Installation Service does not include installation of our pre-made timber bases if purchased from us with the shed. You will need to purchase both the shed and base installation separately. You will still need to ensure that the ground is level with no more than a 65mm gradient across the width of length of the area, that it is clear from obstructions and that the area is not saturated.
 

Concrete


Concrete is by far the best material for creating a base. One of the biggest advantages is that it won’t shift due to the movement of the subsoil beneath the base, a problem that can occur with other types of base.


 A concrete base should ideally sit on a good dressing of sharp sand and hardcore to allow for adequate drainage of rainwater. The concrete base must be level.

Concrete Slabs


Concrete slabs are the next best alternative to a concrete base. The slabs should be laid in such a way to form a continuous base with no large gaps between each slab.


As with a concrete base, a concrete slab base should ideally sit on a good dressing of sharp sand and hardcore to allow for adequate drainage of rainwater. The concrete slabs must be level.


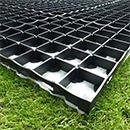
Probase Plastic Bases 


Made from 100% recycled plastic this base is ecofriendly, plus it can be reused if you wish to reposition your shed in your garden. This base also allows for ventilation underneath your shed.


 Its interlocking design makes it easy to put together and, although it is lightweight, it provides a very strong and durable base for your shed.


The Probase should be laid according to the instructions which will include proper ground preparation, use of the provided membrane and inclusion of pea gravel where the size of the shed suggests. One installed, the plastic base must be level.


The installation service is only available on the wooden shed base kits. This service is not currently available on the plastic probases. If you have ordered a plastic probase you will need to prepare and install this base prior to the shed installation.

Other Base Materials


We do not recommend any other materials other than the above for the construction of your base as these may not cope with UK weather conditions and potential subsoil erosion. A shed cannot be placed directly on soil, grass or sand. We also recommend that all bases are constructed by a qualified trades person.


Existing Bases


If you have an existing base that you think is suitable for your new shed, it is essential that you check it is level and doesn’t deviate by any more than 15mm from edge to edge.  An unlevel base will cause the shed to twist, creating gaps in the sections and misalignment of the roof, doors and windows.


To check that your base is level, place a straight-edged piece of timber across the length of the base and place a spirit level on top of the timber near the centre. The bubble in the spirit level should sit comfortably within the 2 centre lines. Repeat the process across the width of the base.


If the base is not level, it is important that you rectify the problem before our installation team arrives. If a base is not ready or (where base installation is purchased) the ground not prepared, the installation will have to be aborted. As indicated below, the re-visit installation will incur an extra charge. This charge will be 50% of the original installation cost previously paid.


Unsuitable Bases


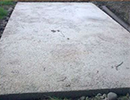
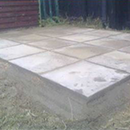
The example images below show unsuitable bases which would result in an aborted assembly.


1) A mixture of broken slabs with no cement filled gaps.


2) Not level due to sub soil movement beneath ground and gaps between the slabs.


3) An unlevel base means the structure walls will not sit square to the floor. This will cause the structure to be unstable and pull apart over time.


4) A base of soil only. Unevenly lying slabs directly on top of a lawn.


Step 3) Access for Installers


Access to location: Please ensure there is adequate access to where the shed is to be sited. The installation company is unable to carry the shed through your home. If you have concerns about access, please discuss this with our Customer Service Team when ordering so we can assess if this will be an issue and if it can be resolved.


Access around base: Please ensure that there is adequate space around the base to build your chosen shed. Please also ensure you allow a minimum of 24 inches working space around the perimeter of the base so our installers have access to all areas of the structure. Please prune back any bushes or trees that may cause issues with the installation.


Step 4) The Day of Installation


Please ensure that someone authorised to confirm the location for the product is present at the property on the booked assembly date.


What happens if we cannot install your garden building?


If the installation team arrive and are not able to complete the installation of your building for any of the following reasons, the installation will be aborted. The re-visit installation will incur an extra charge. This charge will be 50% of the original installation cost previously paid.


1) There is a problem with the product that you have not informed us of after your Product Check Upon Delivery.


2) A suitable base (or prepared ground where base installation has been purchased) is not available.


3) You are not present at your property on the installation date.


Post Installation Check


Our installation team will ensure you are completely satisfied before they leave the site and will ask you to sign off the project. It is therefore essential that you are available when the installation has been completed.


The installation team will guide you around the building to check the build with you. Please take the time to inspect the building thoroughly. Remember to open and close doors, check roof covering and check anchoring if required. The team will then ask you to sign the completion form to indicate that you are satisfied with the product and the build.


If you identify any issues that the team cannot rectify at the time, you should note these clearly on the form before the installation team leave your property. If there are any problems not noted at this point that later require a re-visit to resolve, a call out fee will be charged for the re-visit.


Please note that the installation company are unable to take away any packaging but will leave it tidily for disposal by you.


Any Questions?


If you have a query or require any additional information regarding the delivery and installation of your garden building or if you have any concerns with your item, then please contact a member of our team on 0333 003 0515.


FAQs


Do you install accessories that I have ordered with my garden building?

Unfortunately, we are currently unable to offer installation for our smaller shed accessories. This includes our solar lights and shed insulation.

When will I be contacted about my installation?

Once a delivery date has been booked with you, the installation team will contact you to arrange an installation date. 

When do you carry out the installation?

We aim to carry out installation within 2 - 3 weeks of delivery. 

What time slots are available for installation?

The time slots available will be discussed at the point of booking.