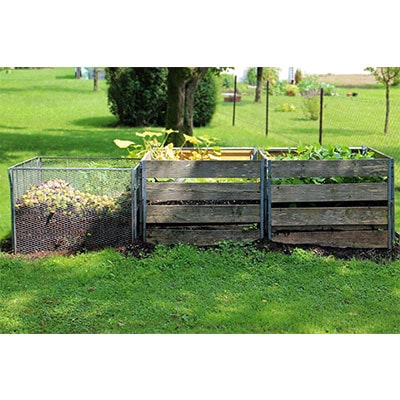
Many people do not know that there is an art to composting. Though it is relatively easy to do, there are specific steps to getting the process right. Making good compost is a pleasure while a poorly maintained heap of compost can be a really bad experience.
When it comes to creating compost for the garden there is a great deal of information available. Some of the information may even seem to contradict what another source says. However, there is an abundance of consensus on what items are good and not good for use in home compost.
Most people also agree that composting is the first true step towards green gardening. In fact, home-made compost is a personal on-site and biological recycling system. Compost is the real beginning of healthy soil because the compost recycles nutrients and builds the structure of the soil. This improves water retention and/or drainage as needed by the garden. In addition to the benefits composting provides the garden, when done correctly the process of garden recycling is good for the environment. When items such as garden waste are sent to a landfill they end up getting buried in such a way that air (oxygen) cannot reach them. Since air cannot reach the items, they produce methane gas as they break down. Methane is a harmful greenhouse gas that damages the Earth's atmosphere.
It is pretty easy to get started composting at home. Composting is an inexpensive and natural process, producing nutrient-rich food that is valuable to the home garden.
Seven Easy Steps to Composting at Home
- Choosing the correct site for the compost is very important. It must be a location that is reasonably sunny and preferably on bare soil. Patio slabs, tarmac, and concrete are not the ideal base for a compost bin, but if one of these is the only option then make sure to place a layer of twigs and paper or a bit of existing compost on the bottom. This will allow the colonisation of worms and other creatures. The site should also be easily accessible for adding ingredients and for retrieving completed compost.
- It is vital that the right ingredients are added to make good compost. (See the subtitled section below for more information about the items to compost and the items not to compost.) A good tip for composting at home is to have a container that is readily available such as a kitchen caddy for collecting the items that will be transferred to the compost bin from throughout the house.
- Fill the compost bin up by emptying the items from the kitchen caddy and adding any appropriate garden waste.
- All that is required now is to wait for a while. It may take between nine and twelve months for the composting process to complete and for the compost to be ready for use. Remember to keep adding ingredients to the top of the compost throughout this waiting period.
- The compost is now ready for use. The compost will resemble the consistency of thick, moist soil; it will be a crumbly, dark material. Another indication the compost is ready to use is it will have an earthy, fresh aroma.
- Depending upon the type of compost bin that was used, the compost can be removed by lifting the bin slightly off the ground or by opening a hatch at the bottom and then scooping out the nutrient-rich compost.
- Finally, use the compost on the garden or even to feed the lawn. Further enhance the garden with new plants, updated fencing and furniture.
Making Good Compost Relies Upon Using the Correct Ingredients
Getting the right mix is what makes for good compost. The key to this is balancing the greens and browns that are used in the compost. Greens are things like fruit waste, tea bags, vegetable peelings, plant pruning’s, and grass cuttings. Browns include items like small twigs, scrunched up paper, and cardboard egg boxes. The differences between greens and browns have to do with the amount of time it takes for the items to rot and what the two contribute to the compost.
Greens provide important moisture and nitrogen while browns provide fibre and carbon. Browns also permit air pockets to form in the mixture, which is very important to the composting process to ensure that the items can fully break down in an environmentally friendly manner.
Items that should never be placed in the compost are meat, dairy products, cooked vegetables, plants that may be diseased, cat litter, dog excrement, and baby nappies. Weeds with seed heads and perennial weeds like dandelions and thistles should be avoided as well. Remember there is a difference between recycling and composting, although composting is a sort of garden recycling. Recycling in and of itself has to do with plastics, glass, and certain metals that are not fit for composting.
Items to Compost and What they Provide
Banana peels, clover, coffee grounds (and filters), dog food, feathers, flowers, fruit peels, green grass clippings, hair, hay, leather (leather waste), and vegetable peels and scraps all provide Nitrogen to the compost heap.
Cardboard, cocoa hulls, corncobs, dryer lint, dried grass clippings, hedge clippings, hops, leaves, newspaper, nut shells, oak leaves, sawdust and wood shavings, paper, peanut shells, peat moss, pine needles and cones, tea leaves, and weeds all provide Carbon to the compost heap.
Items to Avoid Composting
Cat litter (used) and cat/dog droppings may contain disease organisms and should never be composted. Coloured paper, non-biodegradable materials, and toxic materials should not be composted. Meats, fat, grease, oils, and bones can attract pests, coat materials as a sort of preservative and prevent them from breaking down so they should never end up in a compost bin. Finally, avoid placing lime peels or any part of a lime in a compost heap because the high alkaline pH is likely to kill the composting action.


