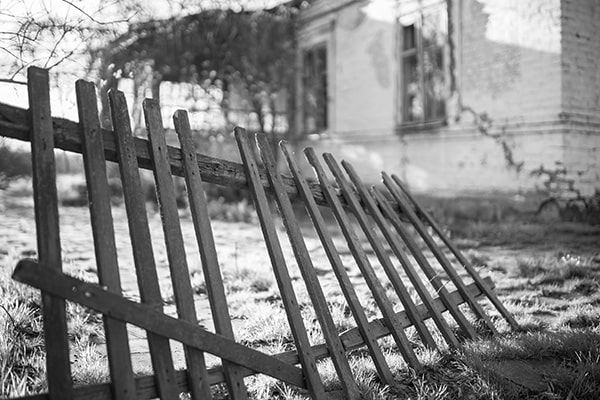
Every wooden fence has a lifespan and that can, unfortunately, be shortened by a number of factors. If the fence has been damaged by the elements, or an errant football, or has been in constant and direct contact with the soil, things may rot earlier than expected. Read on as we explore how to repair a wooden fence.
Editor’s Note [06.09.2024]:
Our blog article “How to Repair a Wooden Fence” was first published on February 28, 2017. Today has seen an entire rewrite of the article with every section being updated with the latest in how to fix a broken fence advice.
Assessing fence damage - identifying the problem areas
Ongoing assessment is a part of your regular fence maintenance. It is no accident that we start this article with assessments and maintenance as if you get assessments right, you will dramatically reduce the need for later fence repairs.
PREVENTION IS ALWAYS BETTER THAN CURE!
|
Regular inspection routines
Buy Fencing Direct recommends twice-yearly inspections of fencing runs as a minimum. We also recommend quick checks following any significant weather events such as storms or strong winds.
Fencing health check assessment tasks
These are checks we would recommend as part of a fence health check assessment. These will prevent a worsening of fencing issues and are all common types of damage in wooden fences:
- Alignment check - ensure all fence panels and posts are straight and properly aligned
- Bracket inspection - examine all brackets and braces for signs of rust or damage and ensure they are securely fastened
- Fence post stability - check the stability of each entire fence post by gently pushing it to see if it moves or wobbles
- Ground clearance - verify that the bottom of the fence is not in direct contact with the ground to prevent moisture damage
- Paint or stain condition - assess the condition of the paint or stain, looking for peeling, chipping or fading
- Panel attachment - inspect the attachment of each wooden fence panel to ensure screws or nails are secure and not protruding
- Pest damage - look for signs of pest damage such as holes, sawdust, or discoloured wood
- Rot inspection - check for soft, discoloured, or crumbly wood that indicates rot
- Soil erosion - examine the ground around the fence posts for signs of soil erosion or instability
- Vegetation control - ensure vegetation near the fence is trimmed back to prevent excess moisture and insect access
Gathering necessary materials and tools - preparation for repair
The list is potentially endless, but the following provides a clear idea of many of the items necessary.
Fencing materials
The following fencing materials will be needed, depending on the approach you take:
- Additional soil (for stabilising posts)
- Brackets or braces
- Concrete mix
- Lubricant (e.g. WD-40)
- Post caps
- Replacement wood panels or boards
- Retaining wall materials or landscape timbers
- Galvanised screws or galvanised nails
- Wood preservative
- Wood stain or paint
Fencing tools
Ensure the following tools are available when you repair a wooden fence:
- Crowbar
- Drill (with bits)
- Hammer
- Level (spirit or electronic)
- Measuring tape
- Paintbrush or roller
- Putty knife
- Sandpaper
- Saw
- Screwdriver
- Shovel or fence post hole digger
- Sledgehammer or mallet
- Stiff brush
- String line and pegs
- Wheelbarrow
Fencing personal protection equipment (PPE)
We recommend the following PPE for when you are attempting fencing repair:
- Dust mask
- Ear protection
- Protective gloves
- Safety glasses
- Steel-toed boots
Step-by-step guide on how to repair a wooden fence
If you need to repair a wooden fence, our step-by-step guide is provided below:
Step 1 – Preparing the area
Our first step is an often overlooked, but necessary task – preparing the area. This involves clearing the surrounding area and the removal of debris, dirt, stones, etc. This saves you doing it later and removes potential trip hazards (e.g. children’s toys).
We would advise you to approach repairs on a dry day, when the fence is dry and remove any loose dirt or plant growth off the wooden fence panel before you attempt a repair.
Step 2 - Removing damaged boards or panels
Get your hammer or crowbar and gently pry away any broken or rotten fence panels. This is usually easy, but you may encounter stubborn nails or screws. In such cases, apply WD-40 (or similar oils) for lubrication or use a screwdriver or drill to ease removal. We advise wearing protective gloves and safety glasses to prevent injury from sharp edges or flying debris.
Step 3: Repairing or replacing a broken fence post
This process is quite complicated and usually is not necessary. If you need to learn more about how to fix a broken fence post, we have written a dedicated post on this topic, click here for details.
Step 4: Fixing or replacing rails
You may have earlier identified rails with cracks, rot or general instability. Minor damage can often be made by reinforcing the rail with additional screws or brackets. If you have severely damaged rails, you will need to cut a new piece to size and secure it in place. Then ensure that the newly added rail is level and securely fastened in place.
Step 5: Installing new boards or panels
To install new boards or panels follow these steps:
- Measure - accurately measure the dimensions of the replacement fence panels. Ensure your new panel meets these dimensions
- Cut to size - cut the fencing to size with a saw, taking care to make straight cuts
- Position and secure - position the panel in place and then secure with either screws or nails to your existing fencing structure
- Check alignment - ensure that the fence panels are aligned, level and each one is spaced evenly in your fencing run
- Reinforce weak points - if you identify any weak points use additional fasteners for extra securing of panels in place
Step 6: Painting or staining the repaired sections
This is easy but requires high-quality paint or stain, that is both weather-resistant and matches the existing fence colour. First, prepare the panel surface by sanding down any rough areas. Also clean off any algae, dust, or debris.
Take your paintbrush or roller and apply the paint or stain evenly. For a smooth finish work in the direction of the wood grain. We recommend two coats are applied (in most cases) and you need to allow sufficient time for the panel to dry before applying the next coat.
How to fix a broken fence - addressing specific issues
Other specific issues which might arise are investigated below. We provide a suggested approach to resolve these different fencing challenges:
Repairing loose fence panels
This is one of the more common wooden fence repair issues. It is often worth checking your fencing run after a storm or adverse weather as this is when loose fence panels most often arise. In many cases, fixes simply involve retightening screws or rehammering nails. Sometimes nails or screws might be missing, so these can simply be replaced.
Additional fence stability can be added with extra brackets or braces being put in place, these reinforce the connection between the panels and the fence posts. As with all fencing repair work, ensure stability by making sure the panels are level and evenly spaced before securing them firmly in place.
Fixing a leaning fence
A leaning fence is often caused due to several reasons, such as weakened posts, soil erosion, or damage from weather conditions. We analyse these in the table below:
Issue |
Fix |
Weakened posts |
Read our blog post for detailed information on fixing fence posts. |
Soil erosion |
Stabilise the base of the timber fence post by adding soil and compacting it to replace lost soil. Consider adding a retaining wall or landscape timbers to prevent future soil erosion. Also, consider planting low-growing plants that spread across the soil layer. |
Weather damage |
The weather is likely to cause a loosening of fence panels and posts. The main task here is to re-secure these with screws, nails, brackets, and fixings as required. |
Addressing rot and insect damage
Identifying rot and insect damage is quite easy. Simply look for soft, discoloured wood, with holes or sawdust-like frass around the affected areas. Treatment varies from entire panel or post-replacement to repairs to sections, so refer to our earlier advice to resolve issues.
Prevention is always better than cure, so follow these essential tips:
- Preservative treatment – all wood needs preservative. Apply this to protect wood and it will not either rot or be attacked by insects (as the preservative contains insecticide)
- Keep vegetation trimmed – keeping this at bay will reduce moisture and insect activity
Final Thoughts
Repairing a wooden fence is a crucial task to maintain the aesthetics and functionality of your property. From fixing broken fence posts to replacing damaged panels, each step requires attention to detail and the right materials. Ensuring your wooden fence panels are properly protected with paint or stain will extend the life of your fence, preventing issues such as rot and insect damage. Always wear protective safety gear when handling tools and materials to avoid injuries.
Regular maintenance and prompt repairs can prevent a wobbly fence from becoming a larger problem, saving you time and money in the long run. For more extensive damage, such as an old fence post that has rotted through, consider replacing it with a new fence post set in wet cement for added stability. Whether dealing with an entire fence or just a few panels, keeping your wooden fencing in good repair ensures a secure and attractive boundary for your property.
Contacting Buy Fencing Direct
The above “How to repair a wooden fence guide” should be a major help, but if you need advice we are here to help. Why not contact us to discuss the available products at Buy Fencing Direct? Contact us in these ways:
- Phone - 0333 003 0515
- E-mails – send emails through the form on our contact page
- Text chat - use our real-time chat app to message us with text chats. Access this app at the bottom left corner of the screen